
Compared to what we have in IndoECO, the tutorials after SAGA 13 are now a lot more extensive. Not does it starts with an expanded version of the original Primula tutorial, it now also guides the player through Master-Disciple system, your first job change (with detailed instructions on what to do for your job change quest), your first (?) dungeon and the IRIS system. What's more, you will receive enough experience from just the tutorials alone to kick you from level 1 to around level 20++ as well as a quicker and cheaper way to get your first Airship.
The tutorials are split into two parts as shown below:
Tutorial 1:
- 最初の冒険!
- 次の冒険に向かおう!
- 職業選択の自由
- 自由人ぶらり旅 (for Perma-Novices) or [Insert Job Name]に転職しよう (for the other jobs)
- 師弟とは?
Tutorial 2:
- 初めての迷宮探索
- 想いのちから
- 収集好きの大商人
- 不思議な双子
- 飛空庭入手
The tutorials themselves are pretty straightforward and most of the time the navi cursor helps to show the confused adventurer where to go and who to talk to. However, not everyone understands Nihongo as well as Lazy and at some point this might confound the player new to jpECO. So hopefully this series of tutorials to the Tutorials will help such players with their new starts and avoid the bad options which would cause them to miss the goodies.
Note: The last three events in Tutorial 2 (収集好きの大商人, 不思議な双子, 飛空庭入手) will provide you with almost all the materials needed to make your first Airship (the only thing you'll need to get yourself would be Timber (木材) and that's easy to get as well).
More importantly, to players who wish to get this free-and-easy-to-get Airship, I strongly advise you to complete all the Events in both tutorials leading up to the Wondrous Twins (不思議な双子) Event. There is an item which you can get from this Event that contains all the Airship Parts (except the Sails) in one easy-to-carry box, but there have been players who did not receive this during their run of the Event. The exact details are still being looked into, but it's commonly agreed that skipping any of the prior Events will cause you to miss the requirement (or flag) needed to trigger the Parts Box reward.
In short, make sure you do everything properly and you should be fine.
~~~~~~~~~~~~~~~~~~~~~~~~~~~~~~~~~~~~~~~~~~~~~~~~~~~~~~~~~~
We will start with the first tutorial, [最初の冒険!]. This is actually the first of the two original Primula tutorials that we have already seen in IndoECO, so most of us should be quite familiar with these. There are some changes though, most notablely the section involving Tiny Island, which you shall see shortly.
Note: As mentioned, DEM characters have a different start unlike Emils, Titanians and Dominions, so this tutorial will not apply for them.
Let's begin our adventure then!
Tutorial 1 Part 1: 最初の冒険!
Navi reward: Base Experience Enhancer (Light) (経験値ふえ~る(ライト))
After creating your character, the first thing you'll see is this:

The only thing that has not change one bit throughout the SAGAs
Talk to Tita (ティタ). She'll briefly introduce herself and welcome you to the world of ECO. She will then ask if you would like to talk with her some more, or wake up immediately in Acropolis City.


1) 話を続ける (Continue talking)
2) すぐに目覚めてアクロポリスを目指す (Immediately wake up (and head) for Acropolis)
3) 少し考える (Lemme think about it first)
Choose option #1.
Cue falling lightning and you'll be teleported to the next stage.

Red alert. Great.
You now find yourself in the Acropolis Command Centre, where the men have their hands full with an swiftly approaching enemy force. Speak to the Commander (司令官), the nearest man to your right. Noticing you (an errant civilian), he will order you to evacuate immediately. Head now to the blue Warp Point as directed by the cursor.
Before you exit through the Warp Point, the Commander will tell you that there are enemies beyond the door and ask if you'll be fine with your current equipment:


Options:
1) 大丈夫じゃないです。。。 (No way...)
2) 大丈夫、問題ありません!(It's okay, I'm fine!)
It doesn't matter which choice you make; the difference is really negligible. Choosing option #2 will send you straight into the next room (with the Commander's blessings). If you choose option #1, the Commander will give you the Commander's Long Sword (which is just a renamed Replica Sword that will only increases your ATK by 1) and then ask if you know how to equip it.

Options:
1) 分りません。。。(I dunno...)
2) 大丈夫、分かってます!(It's okay, I know how!)
If you choose option #1, the Commander first briefly go through how to equip an item before kicking you out.

In the next room, you'll be reunited with Tita. Follow the cursor and go into...

燃え~
.... This.
Don't worry, Tita have you covered! Before you reach the flames, she will use a Skill Stone on you and transform you into "Tita's Salamander", thus allowing you to pass through fire without a sweat! This is also your very first opportunity to use a marionette (with this character in any case).
Note: You'll only be in this form for 3 minutes. Please don't dilly-dally; I don't think Tita can transform you again after the marionette effect wears off.

"Henshin!"
Upon crossing the wall of fire, you'll come across the first enemies of the game: 3 DEM-00s.

Fortunately, unlike in the past, these chaps can no longer move freely around the map. They will not move from their position even after they see you, so you can safely crush them one by one without the fear of being mobbed.

You'll reach level 2 for both base and job levels after defeating all three DEM-00s (I reached level 3 in this screenshot thanks to the 1.5x exp bonus during the fortnight leading to SAGA 17). After you're done with them, head to the Warp Point which will take you to the next scene. At this point, if you still have the Commander's Long Sword with you, the system will remove it from you.
You will find you and Tita alone in a smoking wasteland, littered with broken machines.

Talk to Tita. During the conversation, a chunk of debris will fly towards her and you, macho adventurer, catches hold before it hits her!

But this piece of junk sure is heavy... Now you are so overweight, you can't move an inch!

Simply click and drag the piece of debris out of your item window to drop it. Once you're done, continue talking to Tita.
She will inform you that you have just witnessed a scene from the final battle of a great war that devastated the Emil World, hundreds of years ago. Thanks to this war, the Emil World was sunk into a long period of chaos and stagnation. However, this is all in the past, and in the current period that you're from, the Emil World has once again regained its peace and prosperity. However, the dimensional invaders responsible for bringing the war to this world are still working their mischief behind the scenes. But Tita has every faith that you would be able to smoke them out and stop them~ (○゜ε^○)
After her declaration of confidence, she'll wrap you out to the next stage.

Back to your dreams again. Note the change in Tita's clothes.
Talk to Tita. She will now guide you through the Event Navigation System which you will be using for the rest of the tutorials. In the window that is automatically opened for you, double-click the first option [最初の冒険!] and click "ok".

The Navigator Window will appear, as well as a large "EVENT" sign over Tita's head. Talk to her again.

Your next stage of

This is one of the few places in ECO that have a night setting,
though for Tiny Island, this only happens during a couple of festivals.
Talk to the EVENT Tiny (タイニー). It will first ask if you know anything about Marionettes (マリオネット):

Options:
1) 知っているよ (I already know)
2) 知らない (I don't know)
Choose option #2 for a very brief explanation on Marionettes. Choose option #1 if you want to skip.
Tiny will next ask where you'll like to go next (which is of course Acropolis City). However, before that, it would like to request for your help on a matter... What do you say?

Options:
1) いいよ!(Sure!)
2) 先を急ぐので。。。 (I'm in a hurry...)
3) ちょっと考えさせて (Let me consider first)
If you choose option #2, you'll be immediately sent off to Acropolis, missing out the rest of this section (and its freebies). Choosing #3 will puts off your decision (and your next step) until you talk to Tiny again. So obviously, the choice to make is... #1.
Tiny will then explain that it's worried over the feud between the Pirate Tinies and the Native Tinies, and hopes that you can help do something about it. After you finish talking to it, follow the navi cursor to the Pirate Tiny (パイレーツタイニー) at the other side of the island. Talk to it.

Ahoy there, and stay away from our ship!
Pirate Tiny will first demand your allegiances to his faction:

It doesn't matter which option you choose here. Both will have you joining the crew so just click whichever you like. For those interested, option #1 says "yes" while option #2 says "no".
After joining, Pirate Tiny will give you a Replica Sword as a gift and proceed to offer an explanation on Quests:

Options:
1) 「クエスト」ってなに? (What's a [Quest]?)
2) 「クエスト」の受け方 (How to take a [Quest])
3) クエストカウンター (Quest Counter)
4) なんでもない (Nothing)
If you would like to learn more about Quests in ECO, choose #1 and #2. If you want to carry on with the tutorial, choose #3.

You are now ready for your first Subjugation (討伐) Quest. A window showing the available quest(s) will appear. There's only one quest now, so just click "ok" to accept the quest. After completing the remaining conversation, you'll see a Quest Info window as shown below.

Note: All new characters start with 9 Quest Points. A note to new players, your character will get 1 Quest Point per 24 hours after his/her creation, up to a limit of 15. Most Quests will consume 1 Quest Point per quest. While some event quests will not consume quest points, you won't always know which these might be, so make sure you have at least one Quest Point before taking any quests.
You are now tasked with eliminating 5 Tiny Flowers (タイニーフラワー) which can be found throughout the island. A note of advice: if the Tiny Flowers drop any Love Bouquets (愛の花束) or Flowers (花), keep them. You'll need them later on.
After completing your errand, return to Pirate Tiny. To report your quest to it, talk to it and choose the option "Quest Counter" again.
Reward: 100 exp for both base and job, 100 Gold.
Impressed, Pirate Tiny will give your next choice of quests:

You will be asked to choose between two Collection (採取) Quests. Quest 1 requires three 花, while Quest 2 requires one 愛の花束. As mentioned, both drop from Tiny Flowers. In any case, after you have made your choice, Pirate Tiny will give you three Item Drop Enhancer (Beginner) (アイテムドロップふえーる(ビギナー)), which doubles item drop rate for 60 minutes. Keep these for future use, it'll be a waste to use them here.
Once you're done, report to Pirate Tiny once again via the "Quest Counter" option. A trade window will appear as shown below. Drag and drop the quest item(s) from your item window into the blue (left) side of the trade window and then click "Trade".

Reward: 200 exp for both base and job, 200 Gold, the admiration of your current employer XD
Your final quest here will be a Transportation (運搬) Quest.

After taking the quest, talk to Pirate Tiny again to receive a Pressed Flower of Apology (おわびの押し花). Follow the navi cursor and take this to the intended recipient, Native Tiny (ネイティブタイニー).

Come and share the peace pipe with me (。・ω・。)
Once done talking to it, return to Pirate Tiny to turn in your quest.
Reward: 400 exp for both base and job, 400 Gold.
Congratulations, you're almost done with this place! Pirate Tiny will now offer to explain on how to raise your stats and how to recover HP, MP and SP:

Options:
1) 「ステータス」の上げ方 (How to raise the statuses)
2) 「HP・MP・SP」を回復しよう (How to recover HP, MP, SP)
3) よくわかった (I already know)
Pick option #1 and/or 2 if you want to find out more. Otherwise, pick option #3 to continue.
After this, Pirate Tiny will finally release you from its
You will now find yourself the south-eastern side of Acropolis' Downtown (ダウンタウン):

Follow the navi cursor and enter the house with the Warp Point.
In it, you will find Emil (エミル) and his Nekomata:

He will welcome you as a fellow Adventurer with some experience and some equipment: Protective Clothes (まもりの服) and Wood Spear (ウッドスピア). The first three characters in an account will also receive an Emil Medal (エミルのメダル) which you can use at specific Vending Machines.
After receiving Emil's gifts, he will briefly talk about the Nekomatas. His Nekomata will also like to possess you for a while.


Options:
1) え?(Eh?)
2) いいよ (Okay)
If you choose #2, Emil's Nekomata will briefly enter your inventory. Before you can equip it though, Emil will first talk about the Emotions and Motions you can use in ECO:

You can equip his Nekomata once he's done with this section.

The face... Why such a difference? OTL
Talk to Emil again (his Nekomata will return its master when you do so). He will send you to the outside of Downtown's Cafe. Follow the cursor and enter the Cafe. You'll find Belial (ベリアル) standing in a corner. Talk to him.

He'll give you a pair of Swift Boots (しゅんそくの靴) and some experience, and then offer some advice:
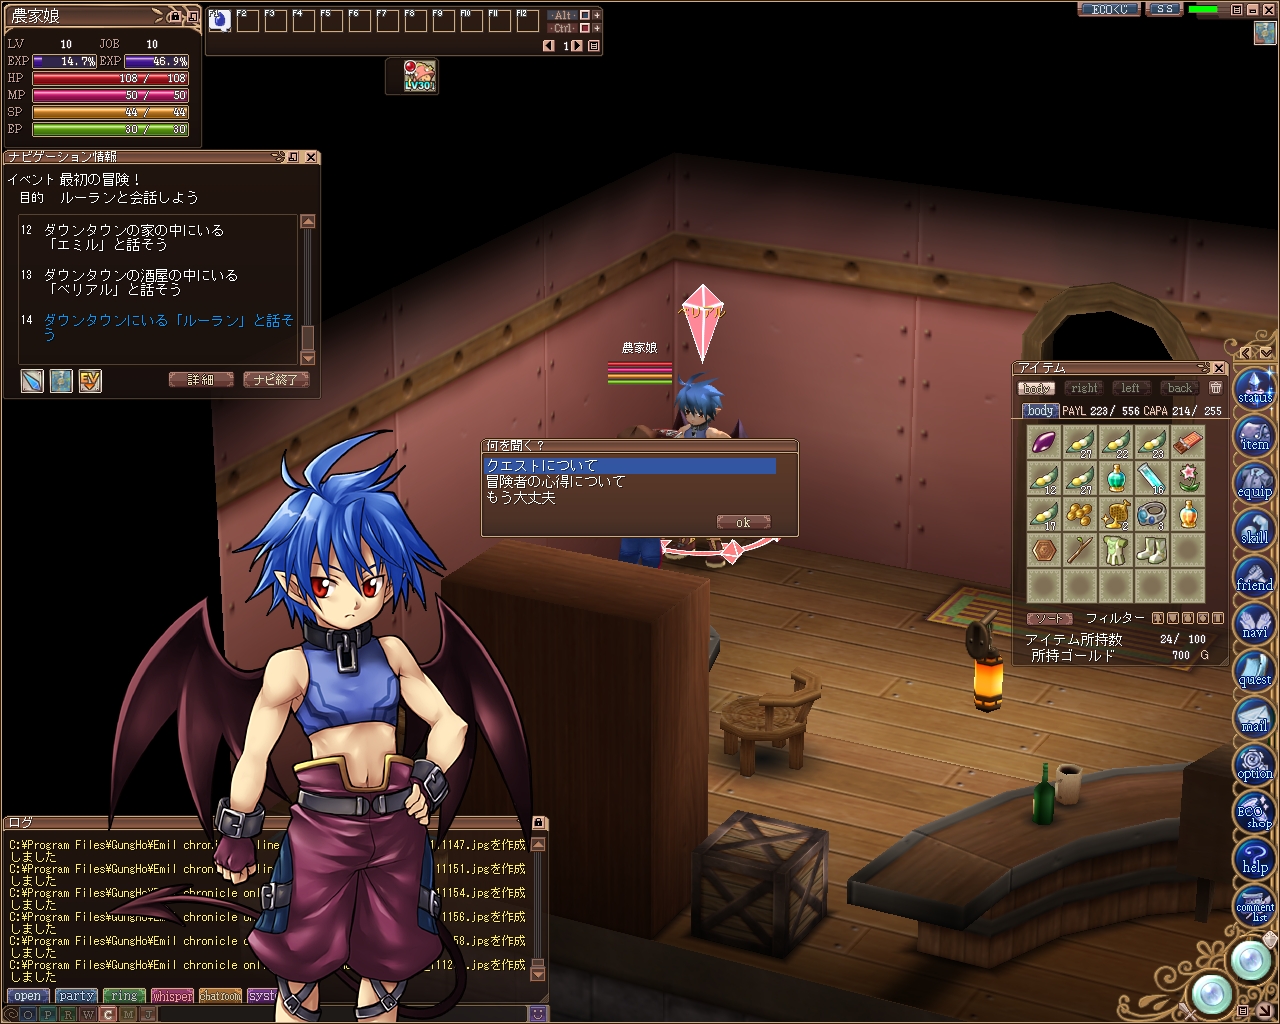
Options:
1) クエストについて (About Quests)
2) 冒険者の心得について (About the things an Adventurer should know)
3) もう大丈夫 (I'm fine/done now)
Option #1 will touch a bit more on Quests while option #2 will have Belial share some beginner's tips with you. Choose #3 if you're ready to move to the next step.
Once done, leave the Cafe and head to the central area of Downtown. Follow the cursor and speak to the old lady with the EVENT tag (下町の上品なおばさん):

She will introduce herself as Louran (ルーラン), Chairwoman of the Guild Committee that governs Acropolis City, and welcomes you to the city. She will then present you an Acropolis Pass (アクロポリス通行証) and a Golem Catalogue (ゴーレムカタログ), and explains their use: the Pass is essential for players who wish to enter Uptown (アップタウン, the upper layer of Acropolis) and the Golem Catalogue is a convenient tool for players going through Golem Shops.
After her explanations, Louran will send you to Uptown, where her granddaughter Marcia awaits. Head south and up the stairs through a Warp Point to Uptown South Movable Bridge (アップタウン南可動橋) and then follow the cursor through the Warp Point to enter Uptown.

In Uptown, follow the cursor until you come to a rope with the EVENT tag hanging from above. Click on the rope to enter Marcia's Airship.


Don't talk to Marcia yet. Enter her Airship House and click on her Flying Squirrel (モモンガ). You'll find (and keep) a Failure Compound (合成失敗物), yet another testament to Marcia's poor culinary skills =3.

After this, exit the House and talk to Marcia (マーシャ).

She'll offer to explain about Airships:

Options:
1) 飛空庭について聞く (Learn about Airships)
2) 別にいい (I'll pass)
If you choose option #2, Marcia will then briefly touch on the background for the Emils, Titanians and Dominions.
When she's done, she'll present you with a Mighty Hammer (ごうわんの槌) and some experience, before sending you off her Airship.
Note: To former IndoECO players, please note that Marcia no longer gives you the Marcia Hotline. Instead, she will tell you about the Help button in the revamped menu (or /help command) which performs the same function.
Your next and last destination for this first tutorial will be the Black Cathedral (黒の聖堂) at the western side of Uptown. Follow the navi cursor and enter the Black Cathedral.

You will find R'lyeh (ルルイエ) waiting for you. Talk to her.

Note: The Navigator for this event has completed its task now that you've reached the last stop of this first tutorial. You will see (as shown above) a pop-up prompt telling you to close the Navigator window. Click "ok" to do so and carry on with the conversation.
She'll first give you a pair of Alluring Pants (みわくのパンツ) and some experience, before offering to teach you about Recruitment Comments and Rings.

Options:
1) 募集コメントについて (About Recruitment Comments/Board)
2) リングについて (About Rings)
3) もう大丈夫 (I'm fine/done now)
If you're done, choose option #3 to continue.
Before sending you off, R'lyeh will inform you about the Event Navigator's Reward system:

Note: For events listed in the Navigation Window, those that you have completed will be marked with "褒賞有" in the Status (状態) column. This means that you can now collect the reward for completing the event whenever you wish. To do so, select the event/reward you want and click the "褒賞受領" button above the Status column.
A list of the available rewards can be found here (in Japanese).
You will then be asked to close the Navigation Window first. Once done, R'lyeh will inform you that your journey will continue in the next tutorial [次の冒険に向かおう!]. To do so, re-open the Navi window by clicking the "navi" button in the menu bar, and then double-click the tutorial.
With this, you've finally this very first tutorial (out of many). Your next stop will be R'lyeh's friend Elina, who will be waiting for you outside the Black Cathedral.
To be continued in the next tutorial....
Uhuu thanks for doing this Esta~
ReplyDeleteWaiting for the next one now >3<
Excellent guide o3o
ReplyDeleteOne Tiny mistake though: "So obviously, the choice to make is... #2." → should have been #1 instead? Since #2 = skip the whole Tiny Island section.
Oh dear, that's a very serious mistake. Thanks for the notice! >_<
Delete*amending now orz*
really helped me out. THANKS
ReplyDelete